|
I am always open to new ideas or thoughts if you may have some, If you have figured out a little tip that makes disassembly or reassembly easy, let me know and I will be glad to include it on this page. |  |
|
Tools and Materials This is a list of BASIC tools needed to start your project:
1. Cordless or corded drill
2. Hammer
3. Small drift punch
4. Dremel tool
5. SMALL (thin) dremel cut off wheels
6. Couple of different sized drill bits
7. 1" closet rod cut to desired length
8. Piece of scrap 2X4 (makes a nice block to rest part on)
9. Not really needed but a nice mill file comes in handy
10. Small center punch
11. LOTS of PATIENCE! |
|
|
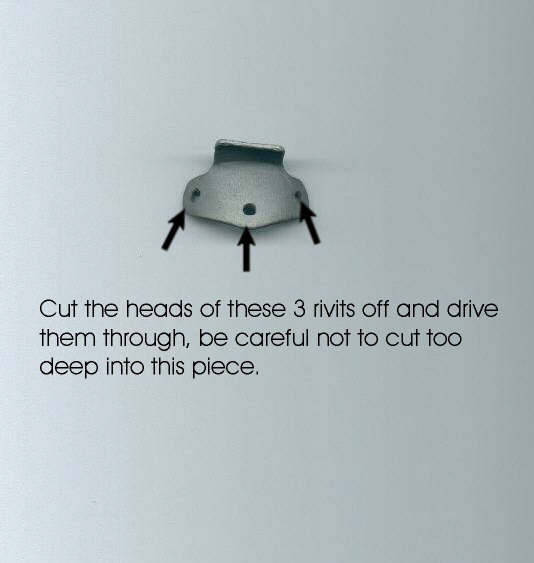
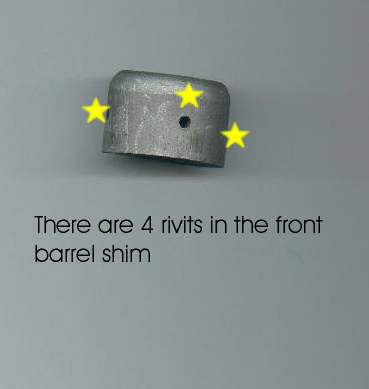
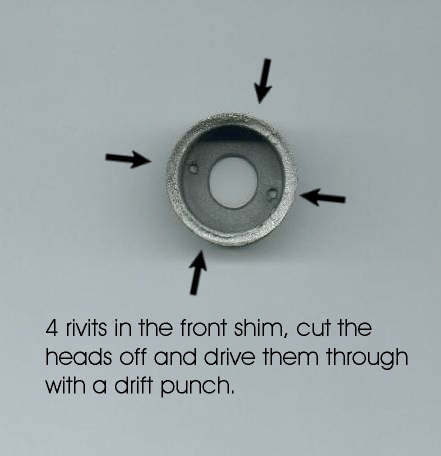
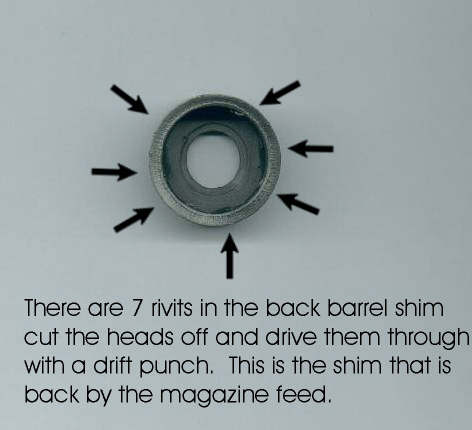
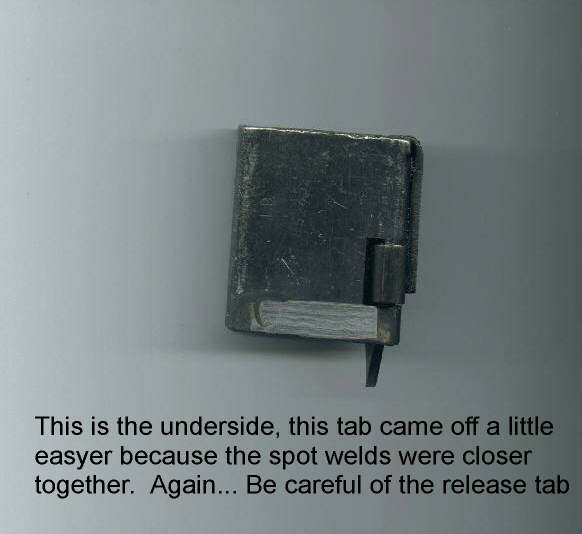
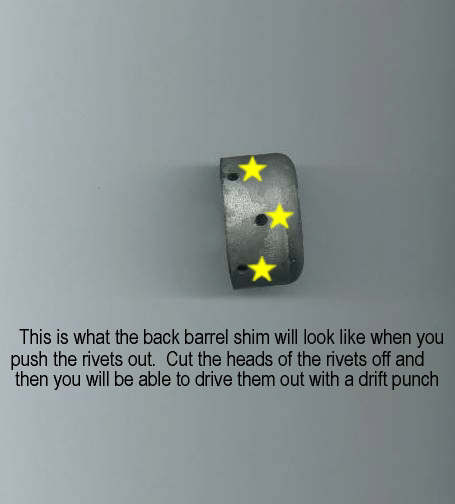
To drill or not to drill... I have had people tell me they drill the rivits out, yes, it may take a little more time to cut the heads of the rivits off and then drive them out with a drift punch, but I personally feel it is a lot easyer to do. Besides there is too much room for error when drilling... You want the existing rivit holes as tight as possible, because I TAP the holes out and use buttonhead screws when it comes time for reassembly, once complete, you simply fill in the heads of the screws with JB Weld and when it dries you re shape them. Or, you can always leave the screw heads exposed for a more elaberate take down later on... I have not been able to locate a source for rivits that are close to factory appearence. |
|